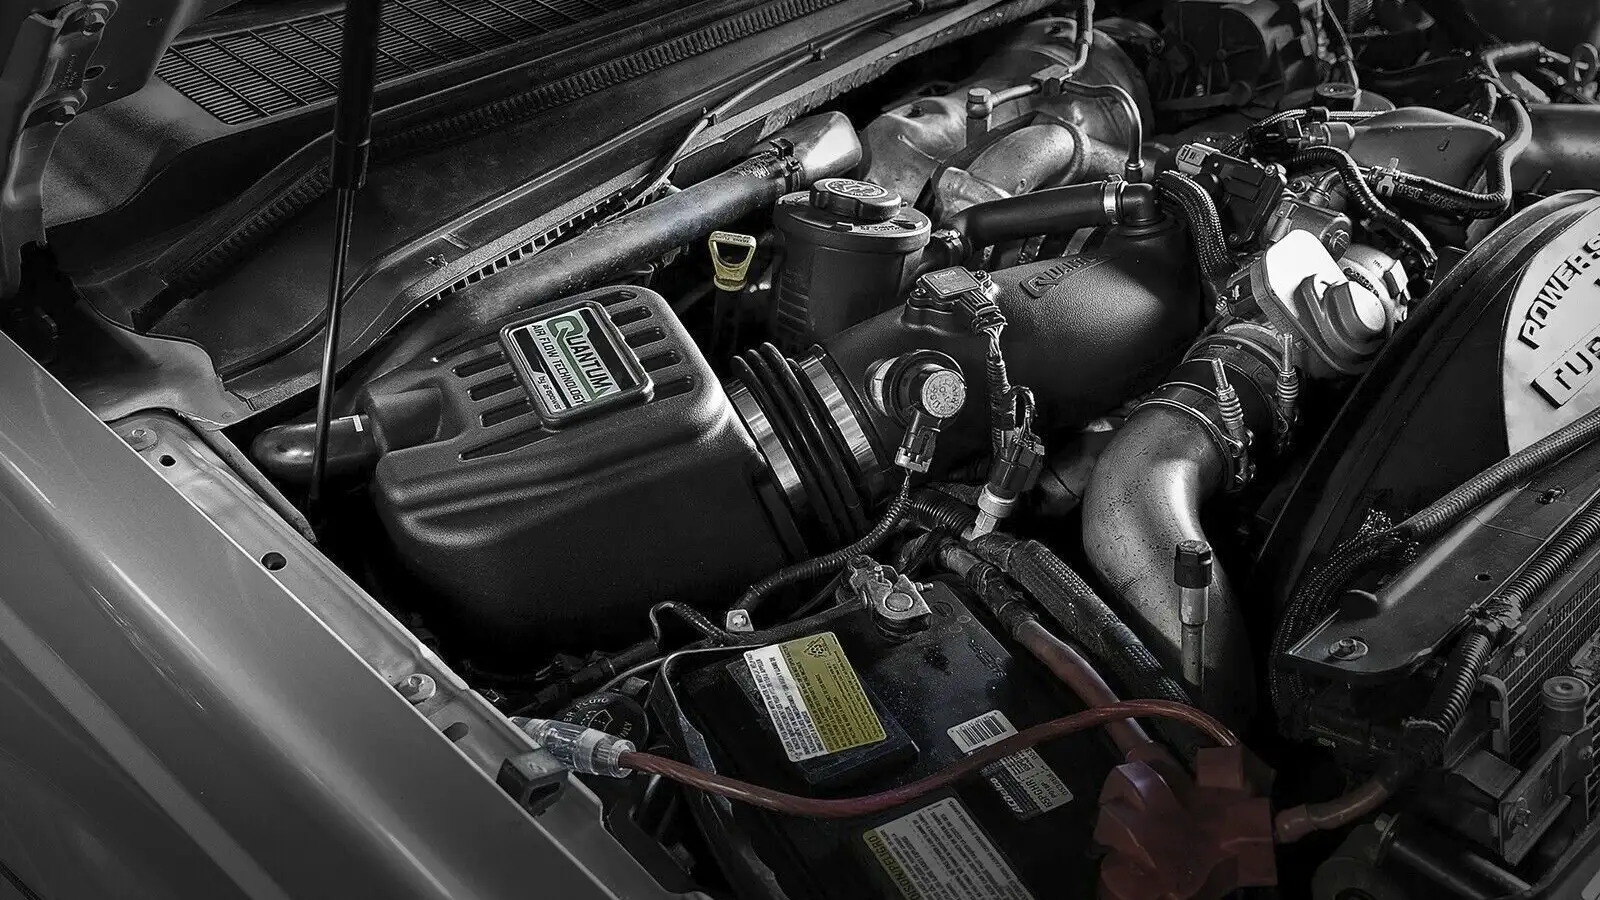
This is an article about install EGR Delete Kit 6.4 Powerstroke. After install EGR Delete Kit, you can potentially see an increase of up to 20% in your fuel economy. Additionally, the EGR delete kit can also help improve your engine’s longevity.
Quick Guide:Install 6.4L Powerstroke EGR Delete Kit
1.Disconnect the Batteries
2.Remove the Air Intake System
3.Remove the EGR Valve and Cooler
4.Install the EGR Delete Kit
5.Reinstall the Air Intake System
6.Reconnect the Batteries
Want to learn more about installing the 6.4L Powerstroke EGR Delete Kit? Keep reading to find out more.
EGR Delete Kit can help improve the performance of your Ford 6.4L engine. By removing the Exhaust Gas Recirculation (EGR) system and using an intake elbow, the kit can help increase power and lower engine temperature. It does this by circulating engine coolant faster than the ordinary EGR system. This can also help improve the reliability of the power stroke engine. Additionally, the kit can help reduce the temperature of the coolant and ensure that the intake manifold is not affected by hot and smoky air, which can affect engine performance.
Tools Required to Install an EGR Delete Kit
To install the EGR delete kit, you will need 10mm wrench、13mm wrench and the EGR delete kit.
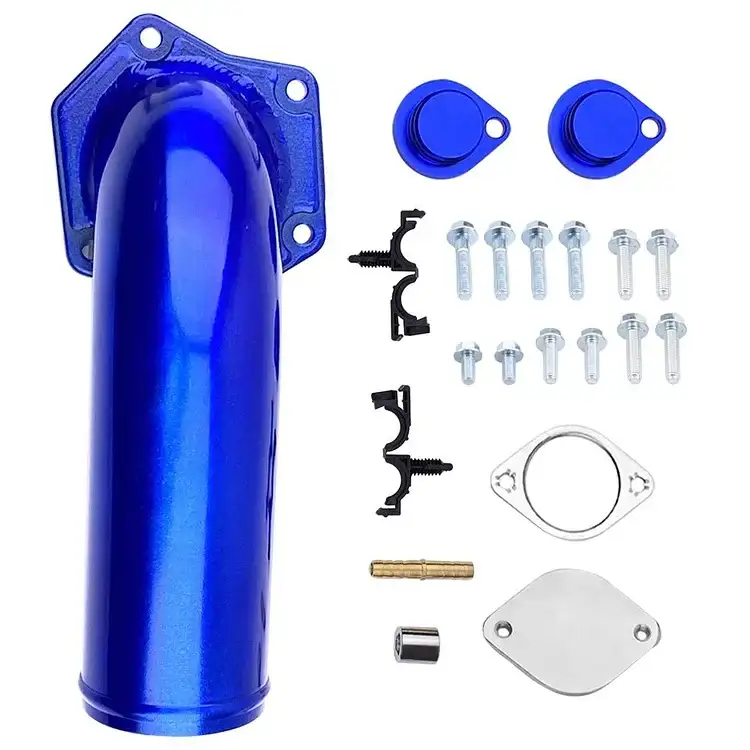
EGR Delete Kit Package Include:
1 x Exhaust Block-Off Plate
1 x Exhaust Gasket
2 x Coolant Line Plugs With O-rings
1 x Brass Barbed Hose Connector
1 x Stand-Off Spacer
4 x M-1.25x 40 Hex Head Bolts (Exhaust Mainfold)
2 x M8-1.25×25 Hex Head Bolts
2 x M8-1.25×16 Hex Head Bolts
4 x M6-1.25×25 Flanged Hex Head bolts
2 x Plastic Hose Routing Clips
1 x Intake Elbow With O-ring
6.4 Powerstroke EGR Delete Kit Step-By-Step Guide
It’s okay if you don’t know how to install EGR Delete Kit. I will provide you with a step-by-step guide on how to install it. If you need any assistance, don’t hesitate to ask for help. Also, if you are a woman, feel free to ask your husband or boyfriend to help you with the installation process. Having a helping hand is always appreciated!
Instruction Steps:
Step 1: Make sure the front wheels are straight.
Step 2: Disconnect both batteries.
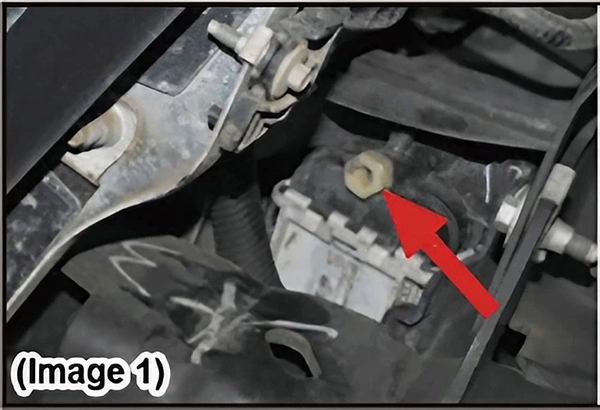
Step 3: Drain the coolant using the coolant drain plug located on the bottom of the radiator on the driver
side. (image 1)
Step 4: Remove the 3/8” hose that runs to the degas bottle. Save this hose, as you will need it later on.
(image 2)
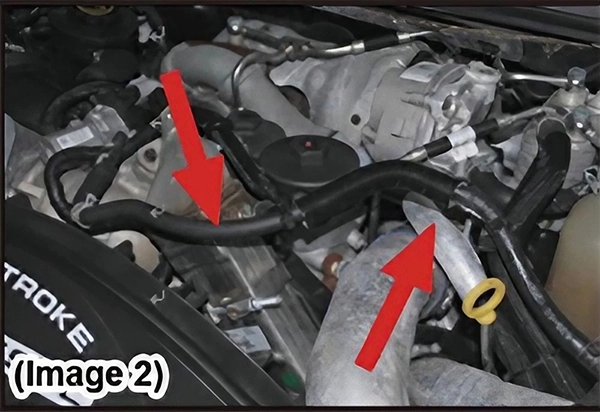
Save the hose from Image 2 for use later on.
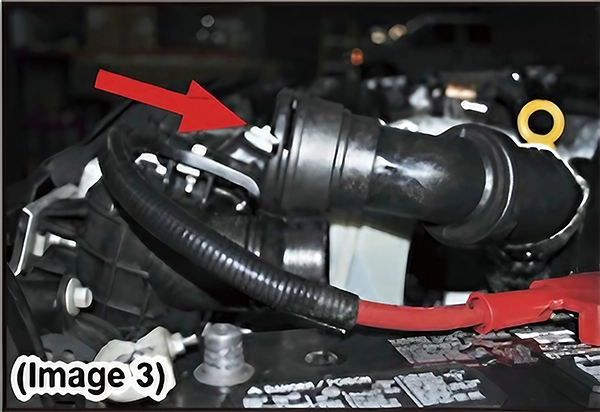
Step 5: Remove the upper radiator hose by popping the wire clip out and pulling the hose straight out.(Image 3)
Step 6:Remove the drversde battery.
Step 7:Remove allofthe coolant hoses going to the degas botle.Also,remove the vent line going to the battery tray.
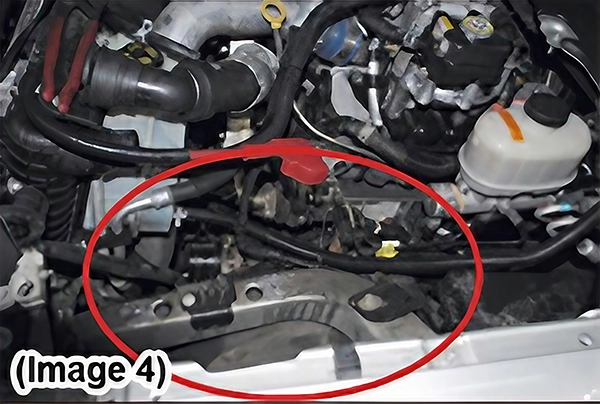
Step 8: Remove the battery tray and degas bottle. This is held on by four bolts.(Image 4-shows parts removed)
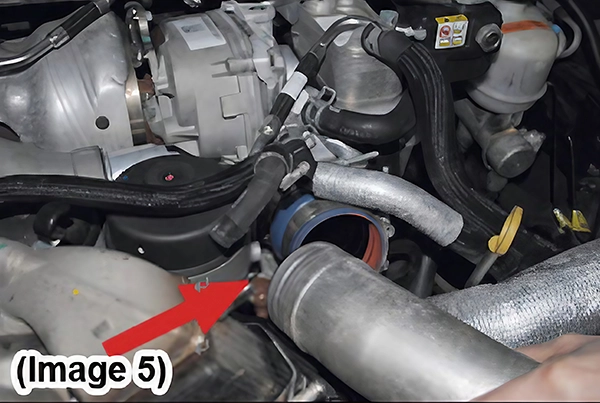
Step 9:Loosen the clamp on driver side intercooler tube and separate the intercooler tube from the rubber boot. It is not necessaryto remove the tube.(Image 5)
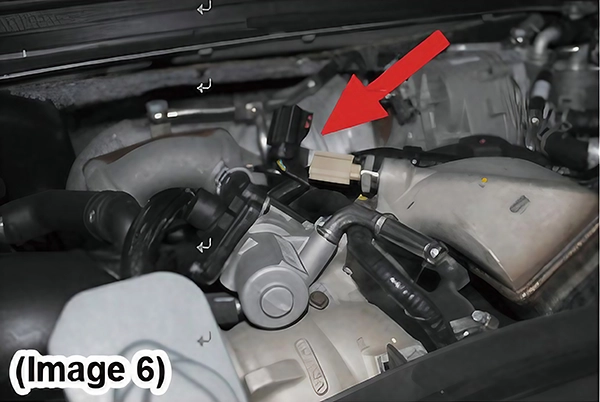
Step 10:Disconnect the electrical connector on top of the vertical EGR cooler.(lmage 6)
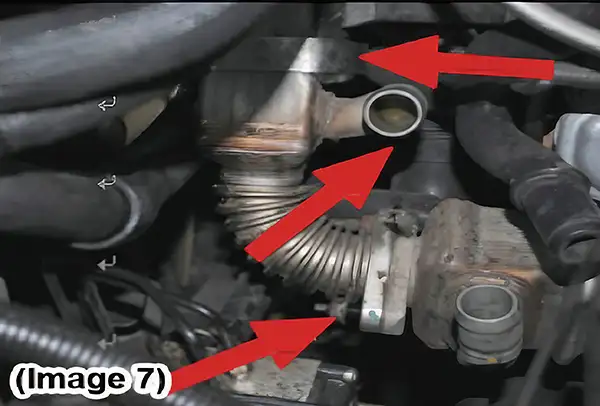
Step 11:Disconnect the coolant lines on the vertical EGR cooler. Remove the nuts and bolts securing the coolers together. Release the mounting clamps and separate the two coolers by prying on the flanges.(Image 7)
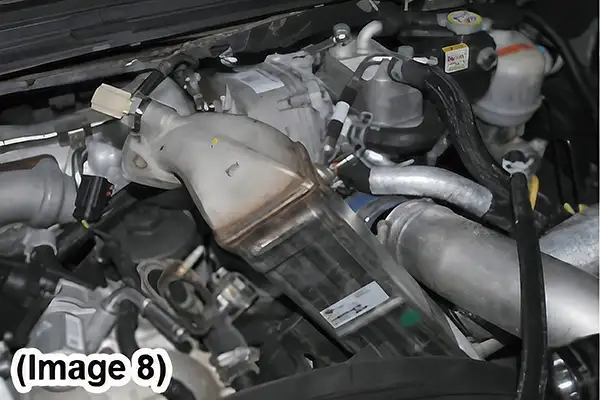
Step 12: Hold the intercooler tube back while pulling the vertical EGR cooler up and out.You may have to rotate the cooler to release it from its mount.(Image8)
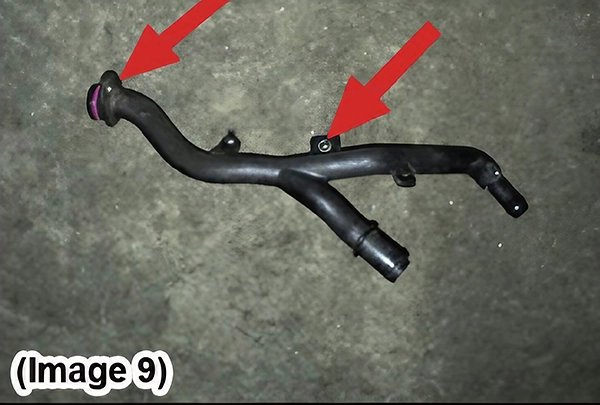
Step 13: Remove the plastic coolant tube.Be careful to not break the coolant tube as it will be re-used during installation.(Image 9)
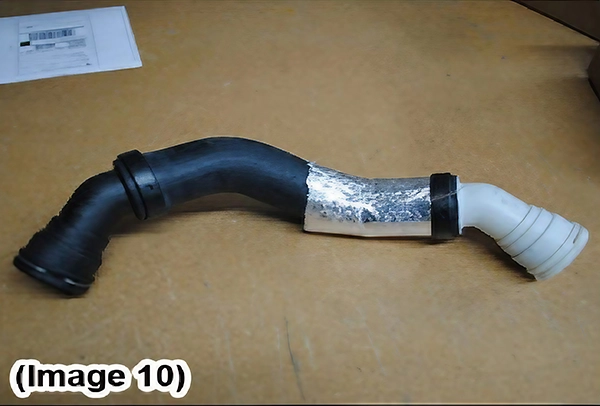
Step 14: Remove the upper radiator hose form the thermostat housing. If your radiator hose has a single O-ring it is a good idea to replace it with a new double O-ring version.(Shown In Image 10)
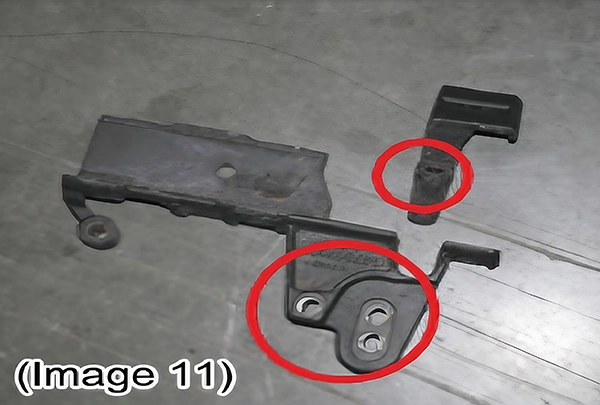
Step 15:Remove the upper EGR cooler mount.Use a 10mm wrench to remove the theree bolts. Use a 13mm wrench to remove the stud. Keep the stud for securing the power steering line during the install.(Image 11)
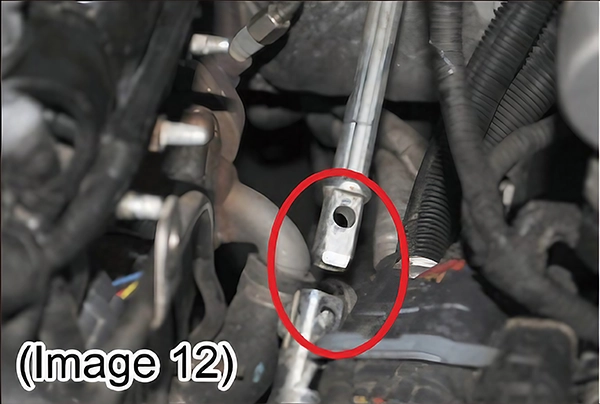
Step 16:Remove the steering shaft bolt and slide the stem up and out of the steering box shaft. Note: Be sure to not turn the steering wheel or tires.(Image 12)
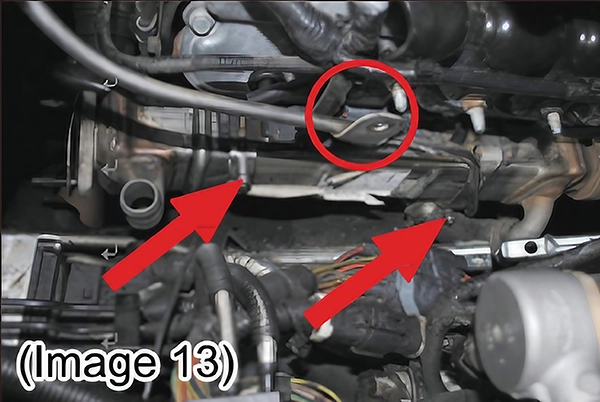
Step 17:Remove the nut that secures the dipstick tube in place.(Image 13)
Step 18:Release the mounting clamps on the lower EGR cooler. tmay be easer to access the clamps
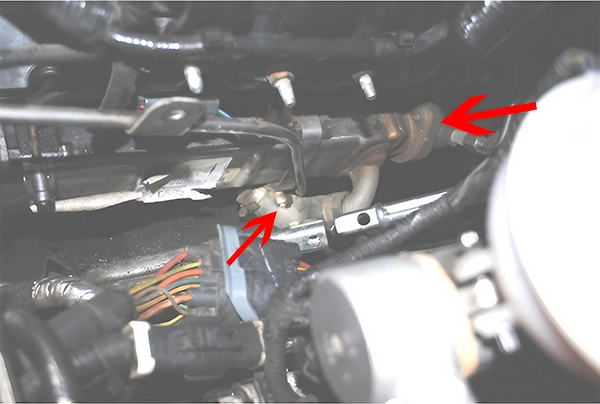
Step 19: Remove the coolant line on the EGR Cooler. It may be easier to cut the line. Note:The line willnot be re-used.(Image 14)
Step 20:Remove the bolts on the rear flange of the EGR cooler.It is easier to access the bottom bolt from underneath the truck and the top bolt from above.(Image 14)
Step 21: With the dipstick moved out of the way remove the EGR cooler by puling forward and rotatng it
out of its mount.
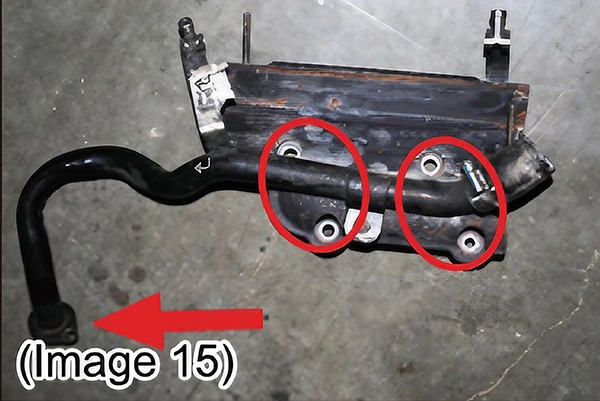
Step 22: Remove the bolt securing the coolant line to the timing cover. This line is attached to the lower EGR cooler mount and will beremoved as one piece.(Image15)
Step 23: Use a 10mm wrench to remove the four bolts on the lower EGR cooler mount.
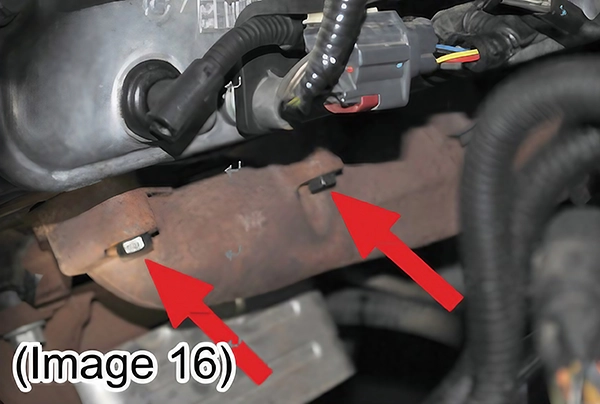
Step 24:Install the four replacement bolts (M10-1.25x 40) in the exhaust manifold and torque to factory specifications.(Image 16)
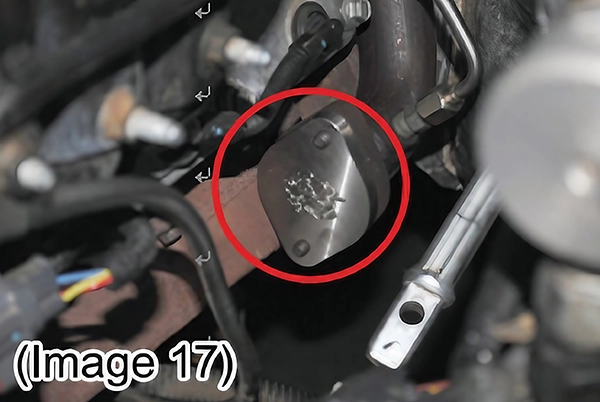
Step 25:Install the exhaust block off using M10-1.125 x 20 bolts and gasket.(Image 17)
Step 26:Remount the dipstick tube with the factory bolt.
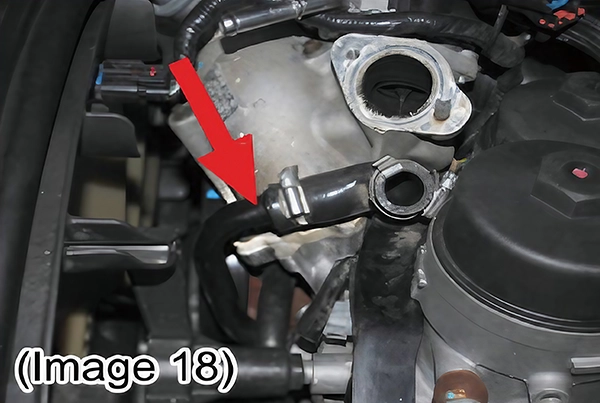
Step 27: Remove the coolant tube that was conneced from the vertical EGR cooler to the engine. Replace it with the coolant plug supplied in the kit to block off the hole.(Image18)
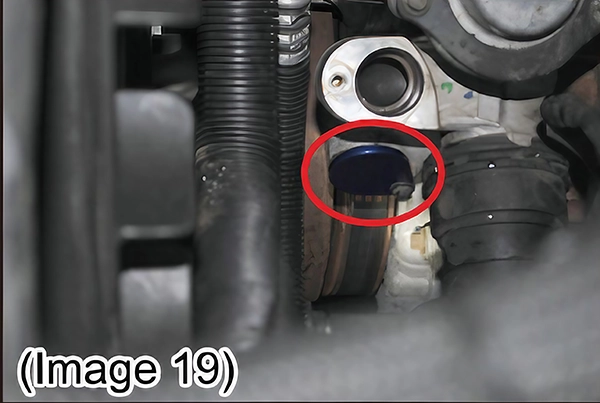
Step 28:Install the coolant plug included in the EGR delete kit. Use the factory bolts that secured the lines in place.(Image 19)
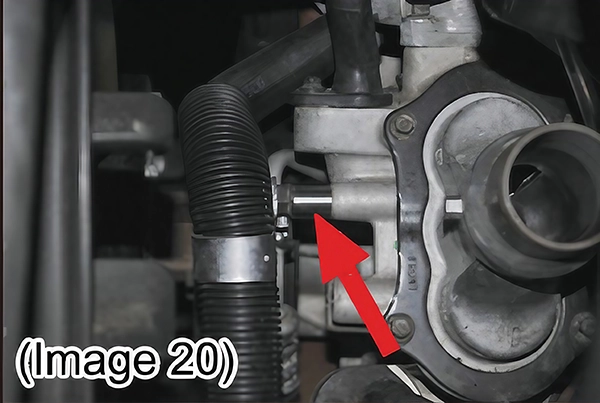
Step 29:Use 13mm wrench to Re-install the stud using the spacer provided in theEGR delete kit. Then secure the power steering line to the stud.(image 20)
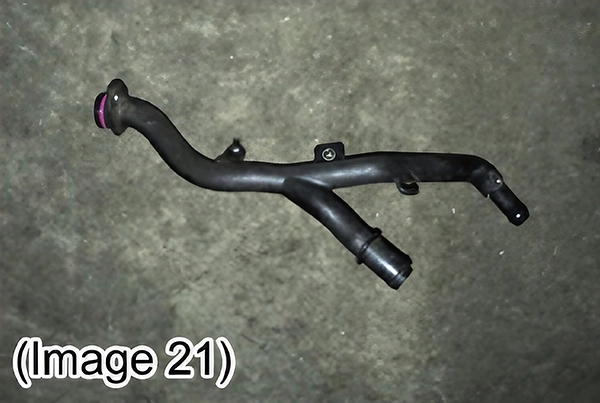
Step 30:Re-install the plastic coolant tube.Be careful not to crack or break it.(Image 21)
Step 31:Re-connect the steering shaft and torque to the factory specifications.
Step 32: Re-installthe battery box and degas bottle.
Step 33:Re-connect the coolant lines to the degas bottle. Aso re-connect the vent line to the battery box.
Step 34: Clean the end of the silicone boot and intercooler tube with glass cleaner.Reconnect the intercooler tube.
Step 35:Re-connect the upper radiator hose and make sure the meta clips are securely in place.
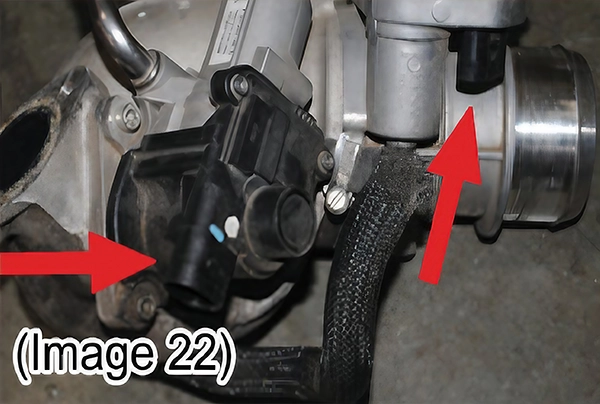
Step 36:Disconnect the wire connectors to the EGR valve.(Image 22)
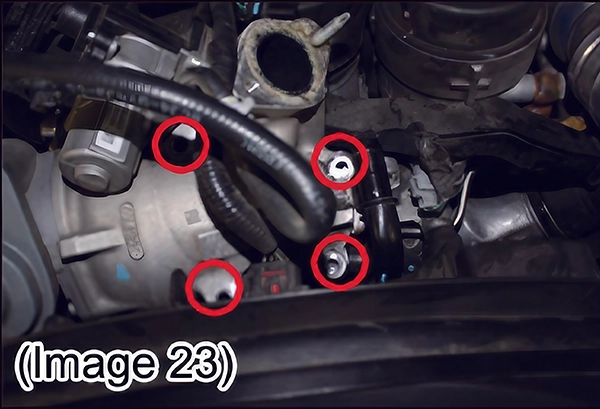
Step 37: Remove four bolts and loosen hose clamp on the intercooler plumbing to remove the EGR valve.(Image 23)
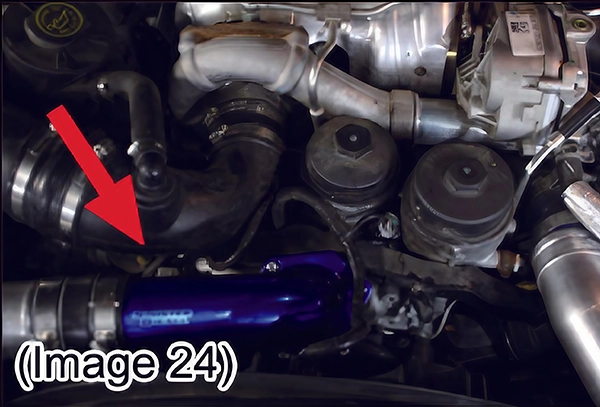
Step 38:Install the intake elbow by sliding the tube into the boot.Using supplied M6-1.25×25 bolts secure the flange to the intake manifold.(Image 24)
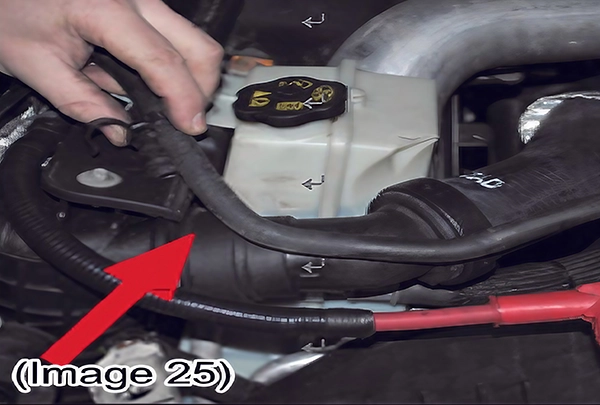
Step 39:Use the 3/8”hose that was saved from step four and barbed hose connection from the kit to re-connect the coolant line running over the radiator to the degas bottle. The line will have to be cut to appropriate length. Reuse factory hose clamps on the connections.(Image 25)
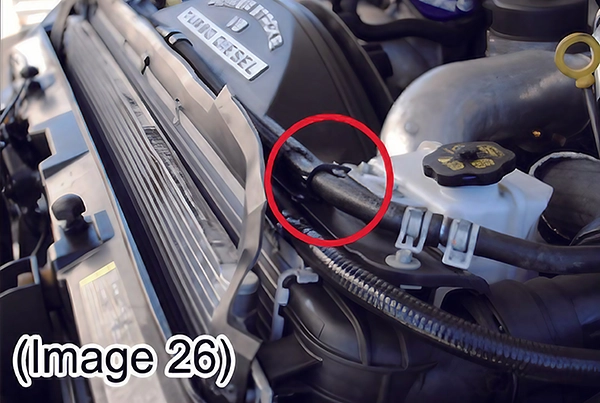
Step 40:Secure the coolant line over the radiator with the plastic hose routing clips.(Image 26)
Step 41:Refillthe coolant according to factory specifications.
Step 42: Run engine and check for leaks.
Feeling practical, add to your favorites or bookmarks bar
Tips for Installing an EGR Delete Kit
1.Caution!!! Never work on a hot Vehicle. Serious injury in the form of burns can result if the vehicle has been in use and the coolant system is hot, allow vehicle to cool for at least 1 hour. Always wear eye protection when working under any vehicle.
2.Get a thick piece of foam to lay on top of the engine. I did but chest is still tender today.
3.Before removing the original parts from your vehicle, please compare the parts you have.
4.With a used vehicle, we suggest a penetrating spray lubricant to be applied liberally to all exhaust.[Source:ford-trucks.com]
5.Not legal for sale or use on pollution-controlled motor vehicles anywhere in the United States.Legal ONLY for off-road competition racing vehicles and cannot be used on vehicles that are operated on public streets,roads, or highways.
Conclusion about Install EGR Delete Kit
Most people have no trouble following the instructions to install the EGR Delete Kit.
By removing the Exhaust Gas Recirculation (EGR) system, an EGR delete kit can help you restore your diesel engine’s power levels, which can also improve your overall fuel efficiency. With this aftermarket kit, you can potentially see an increase of up to 20% in your fuel economy. Additionally, the EGR delete kit can also help improve your engine’s longevity.
If you think this article is useful to you or your friends, please share it with them. For more questions about installing the 6.4L Powerstroke EGR Delete Kit, please post a comment below.
You can also read more guides on installing EGR Delete Kit in different engines
FAQ about How to Install EGR Delete Kit
1.
Question: doesn’t the new intake pipe cause for a failure for the annual vehice inspection ?
Answer:There were rumors awhile back (different PowerStroke motor) that a guy passed the sniffer test while deleted. No one ever had any real proof of the results.[Source:powerstroke.org]
2.
Question:How long did it take you to install the egr delete kit?
Answer:They can be done in 3-5 hours if you have done a few. if you havent then it will take the better part of a day.[Source:ford-trucks.com]
3.
Question:what happens if I remove only the EGR with a tuner, but I do not remove it physically, does it produce a fault?
Answer:You just tell the people tuning the truck that it’s removed and they will put a program that reads over the EGR and you won’t have a problem. Is you buy a tuner off the internet like a H&S mini max just chose the Emissions removed tab when setting up your tuner.
4.
Question:Hows your truck running now ?
Answer:Yes, it went from a 12 to 14 miles to the gallon to a 17 to 19 miles to the gallon on Highway
5.
Question:Is there a video of installing the 6.4L Powerstroke EGR Delete Kit?
Answer:6.4 Powerstroke EGR Delete Complete Step-By-Step Install
