If you’re installing an EGR delete kit for the first time, this article can help you understand the benefits of installing the egr delete kit 6.0 Powerstroke . It can also provide you with information on how long it takes to install the kit and step-by-step installation instructions to avoid any problems you may encounter during the first installation. This can save you time and money in the long run.
Don’t forget to bookmark this post for future use
2003-2007 egr delete kit 6.0 powerstroke
The 2003-2007 EGR delete kit 6.0 Powerstroke is designed for Ford F250-F450 Super Duty trucks with a 6.0L Powerstroke diesel engine. Diesel 6.0l Powerstroke EGR Delete Kit for the 2003-2007ing you faster turbo spool, lower exhaust gas temperatures and better reliability.

EGR Delete Kit Package Include:
1x EGR Cooler Pipe
1x Silicone Coupler
1x Up-Pipe Block Off Plug
2x Clamps
Step-by-Step Guide to Installing egr delete kit 6.0 powerstroke
Instruction Steps:
Step 1: Make sure the front wheels are straight.
Step 2: Disconnect both batteries. Record radio settings then disconnect the negative terminals on both of the vehicle’s batteries, and then disconnect the negative terminals.
Step 3:Drain engine coolant.Remove engine coolant reservoir bottle mounting bolts and disconnect two small hoses. Move the bottle to the side and tie secure in place.(Image 1)
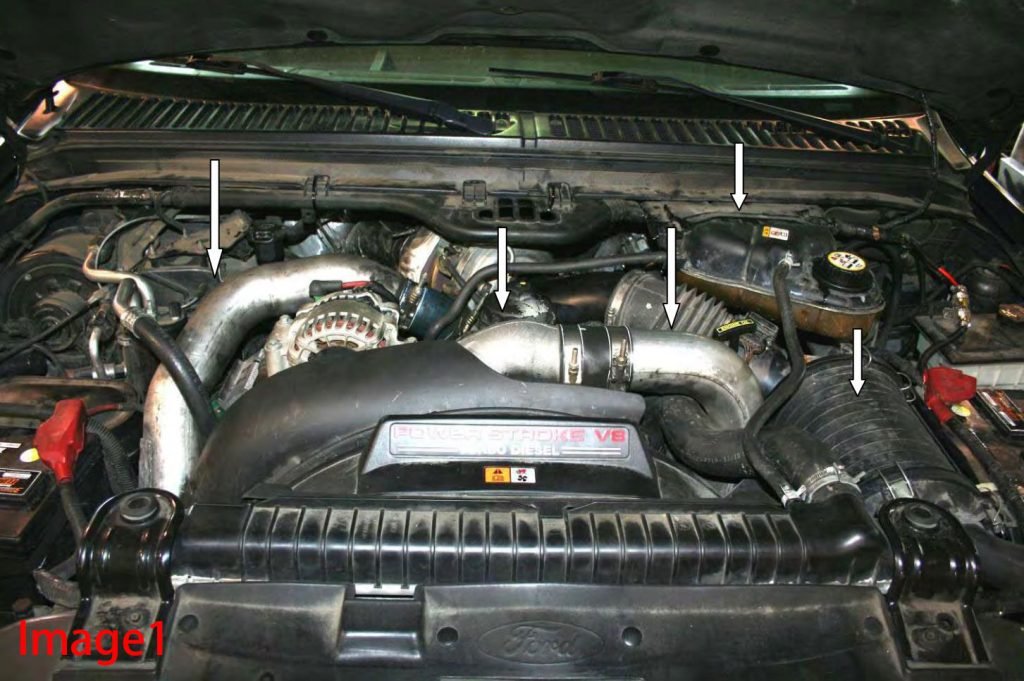
Step 4:Remove the air cleaner assembly by disconnecting the MAF sensor and Filter Mind device. Then remove the ribbed hose, then the air box. Remove the two 8mm bolts securing the hard tube. Then remove the breather tube from the vent on the driver side rocker cover.(Image 2) (NOTE: Wiggling and pulling out on the tube will help in removal).
Step 5:Remove the Intercooler air to air and the turbo inlet air tubes.(Image 2)
Step 6:Remove the top section of the fan shroud which covers the serpentine belt.(Image 2)
Step 7:Loosen the belt tensioner and remove the alternator.(Image 2)
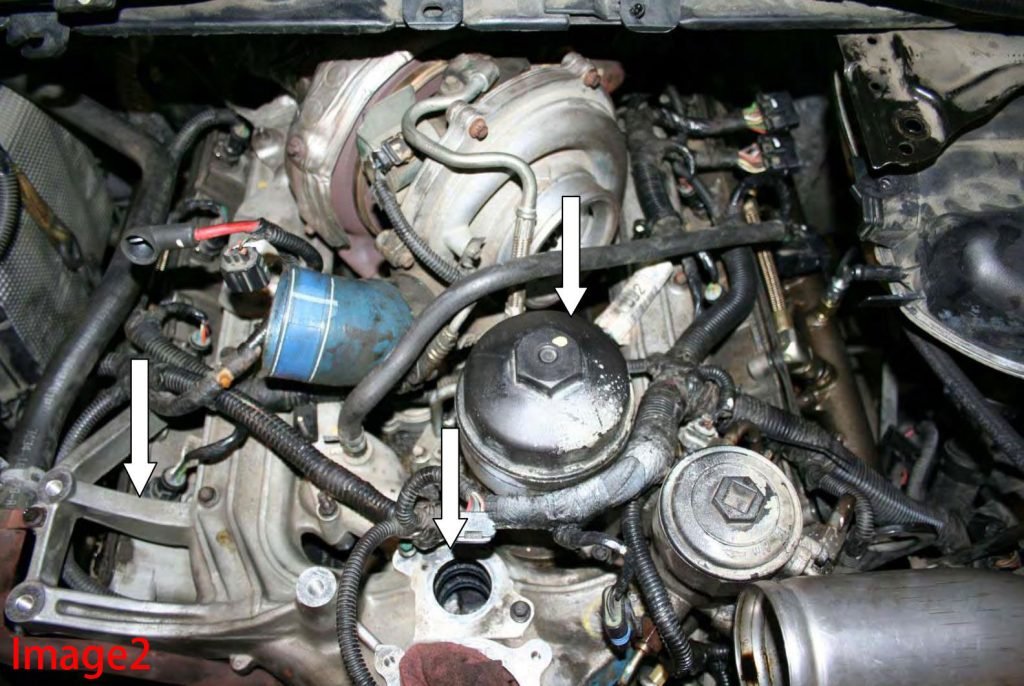
Step 8:Remove the oil filter and EGR valve and service both as required.(Image 3)

Step 9:Disconnect the fuel filter wiring connectors and fuel lines then remove fuel filter housing.(Image 4)

Step 10:Remove the turbo charger by disconnecting the connector on the turbo solenoid and clip, the oil feed link, exhaust downpipe, and exhaust feed pipe clamp.Remove thethree 10mm mounting bolts and pull turbo out.
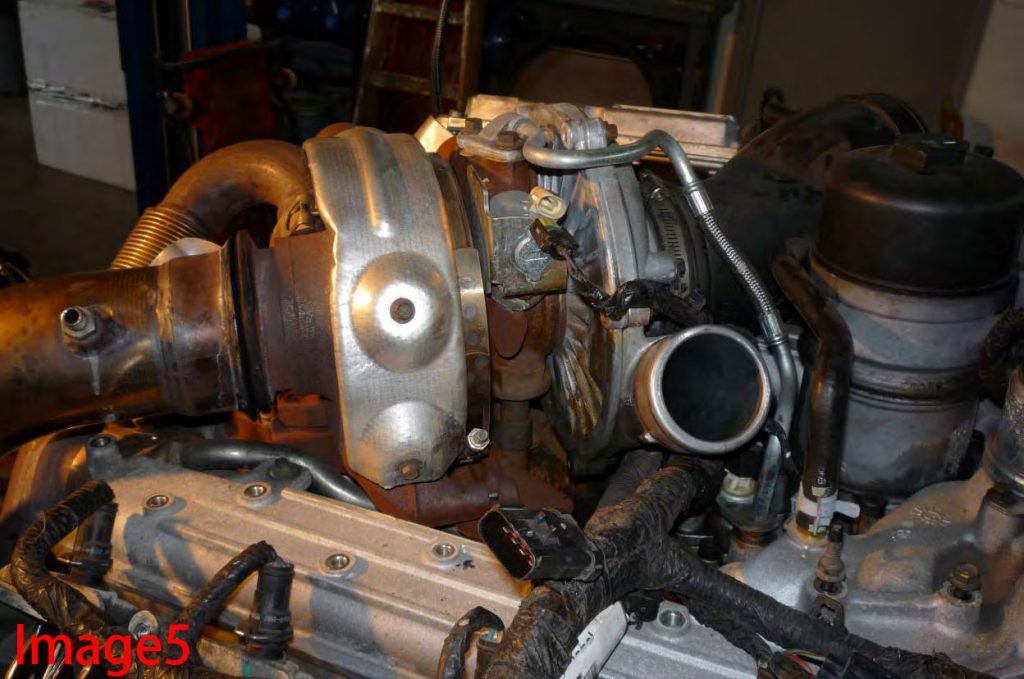
Step 11:Remove the turbo pedestal mount by removing the four 10mm mounting bolts and then remove the oil drain pipe.(Image 5)
Step 12:Remove the FICM (Fuel Injection Control Module) by removing two (2) 10mm mounting nuts and two 8mm bolts. Disconnect the three electrical plugs from the wiring harness.(Image 6)
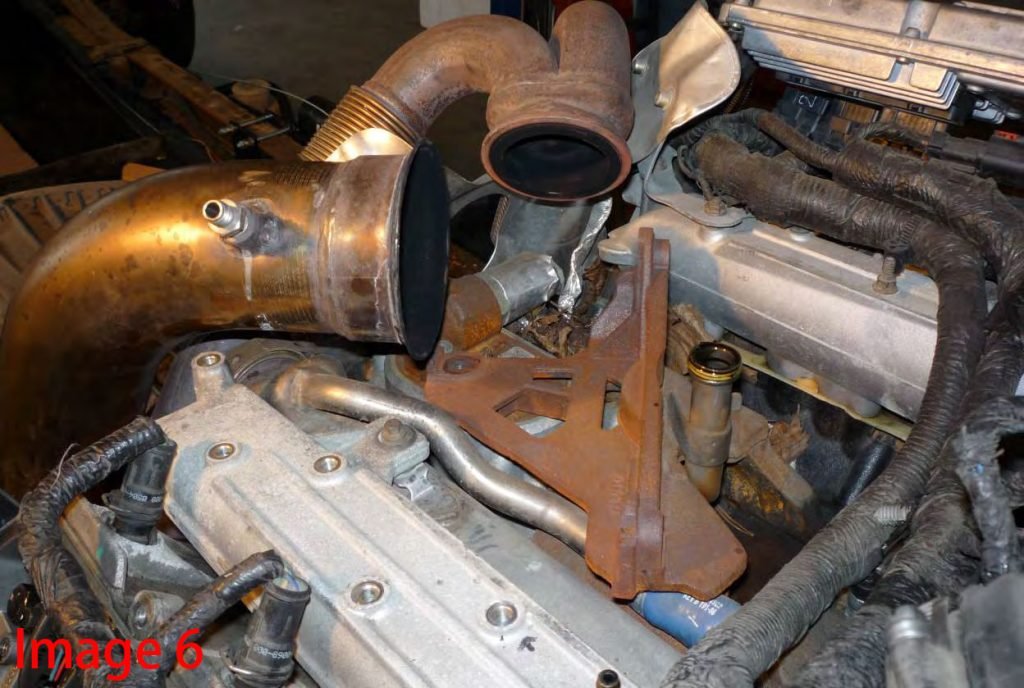
Step 13:Unplug and remove the fuel injector wiring harness.Unplug the engine wiring harness from the sensors and tie the harness out of the way.(Image 7)
NOTE: Bend back the tab on the rigid metal tube at the RH side of intake manifold to allow manifold to clear.
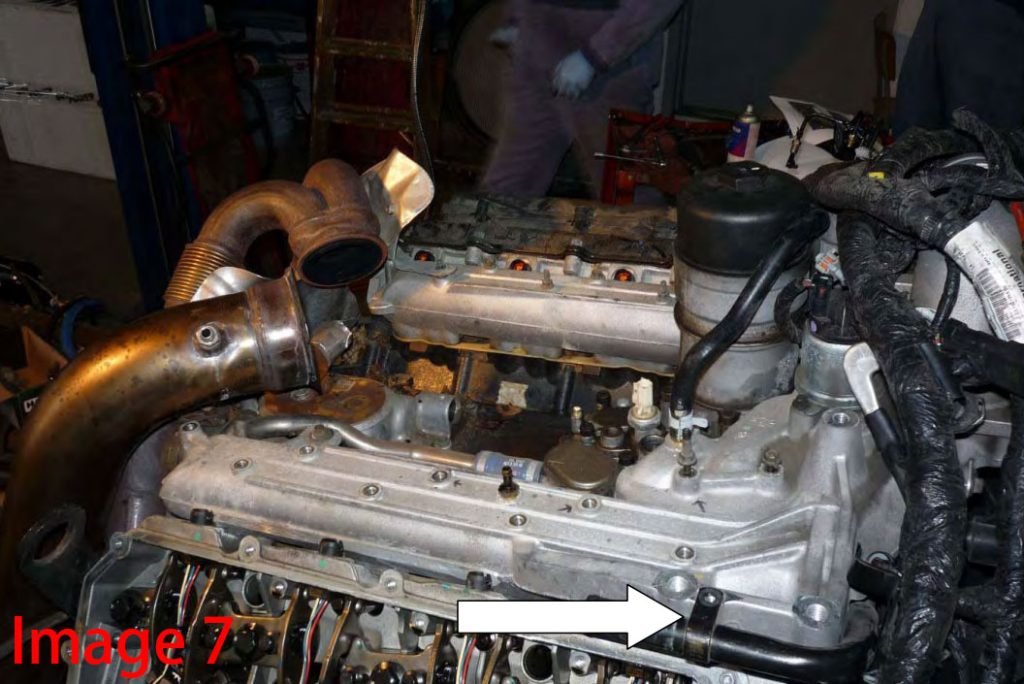
Step 14:Remove the intake manifold by removing the two 15 mm bolts through the shroud to the front of the intake. Remove one 10mm bolt securing the fuel line to the front of the intake. Remove one 8mm bolt at the back of the EGR cooler and two 10mm bolts at the front of the EGR cooler by accessing them through the intake manifold.Remove the 10mm bolts securing the intake manifold and remove the manifold.(Image 8)(Clean carbon from manifold as required)
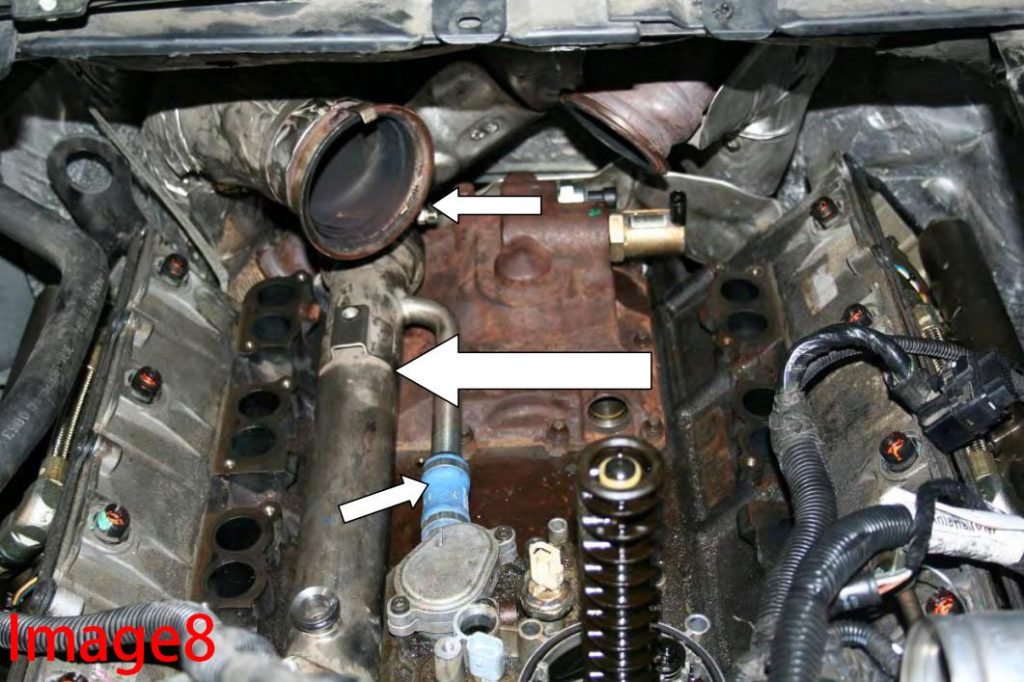
Step 15:Remove the EGR cooler by disconnecting the clamp at the exhaust feed pipe then remove the coolant hose by first cutting the front clamp then twisting to align the release tab and pulling(Image9) (you may have to spread the tab with a small pick or screwdriver).

Step 16:Disconnect the passenger side exhaust feed pipe by removing the two 10mm bolts with 13mm nuts at the top and bottom and remove feed pipe.(Image 10)

Step 17:Re-install the newly supplied passenger side feed pipe using the existing hardware.Install the supplied gasket on the top side of the pipe. Tighten the two
10mm bolts to 30 ft lbs.
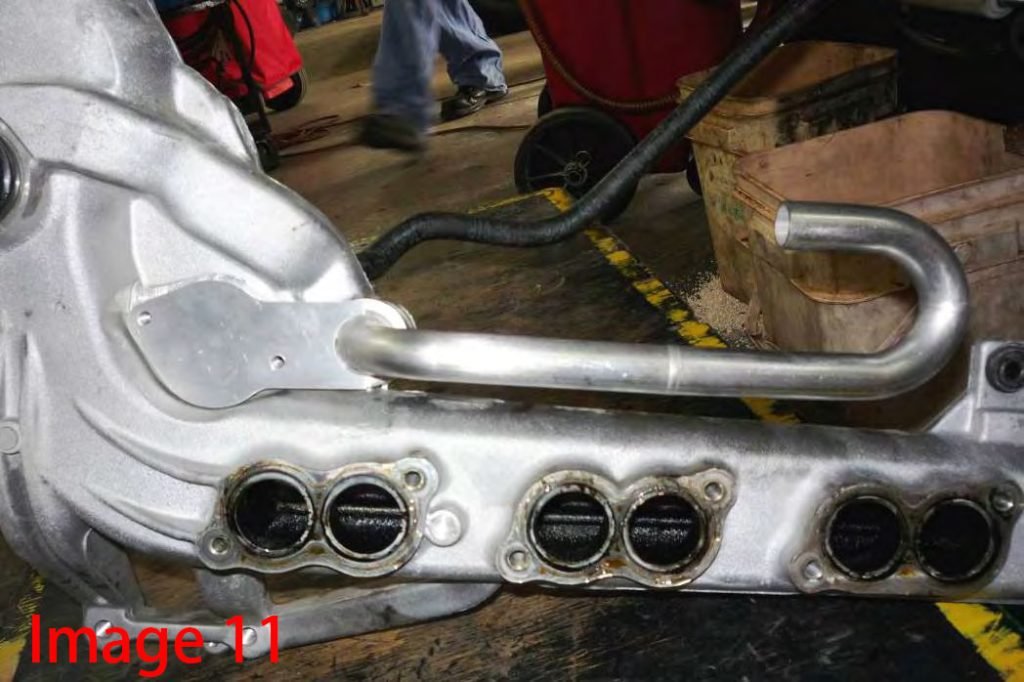
Step 18:Install newly supplied O-ring on the EGR Cooler Bypass Pipe then installpipe into the bottom of the intake. Install newly supplied gasket and the blocker plate over the exhaust port and tighten to 100 inch lbs of torque. (NOTE: This plate secures the new pipe in place).
Install new intake manifold gaskets and intake manifold and tighten mounting bolts in two steps.
1 – Starting at the front and working towards the back, tighten bolts to 50 inch lbs of torque, then 2 – again starting at the front and working toward the back, tighten bolts to 100 inch lbs. Then install, at the front of the intake, two 15mm bolts and torque to 23 ft lbs and one 10mm bolt to 18 ft lbs. Install the silicone coolant hose with two HS10 hose clamps.
(NOTE: Ensure hose clamp screws are installed to the outside as turbo pedestal will NOT fit otherwise.)
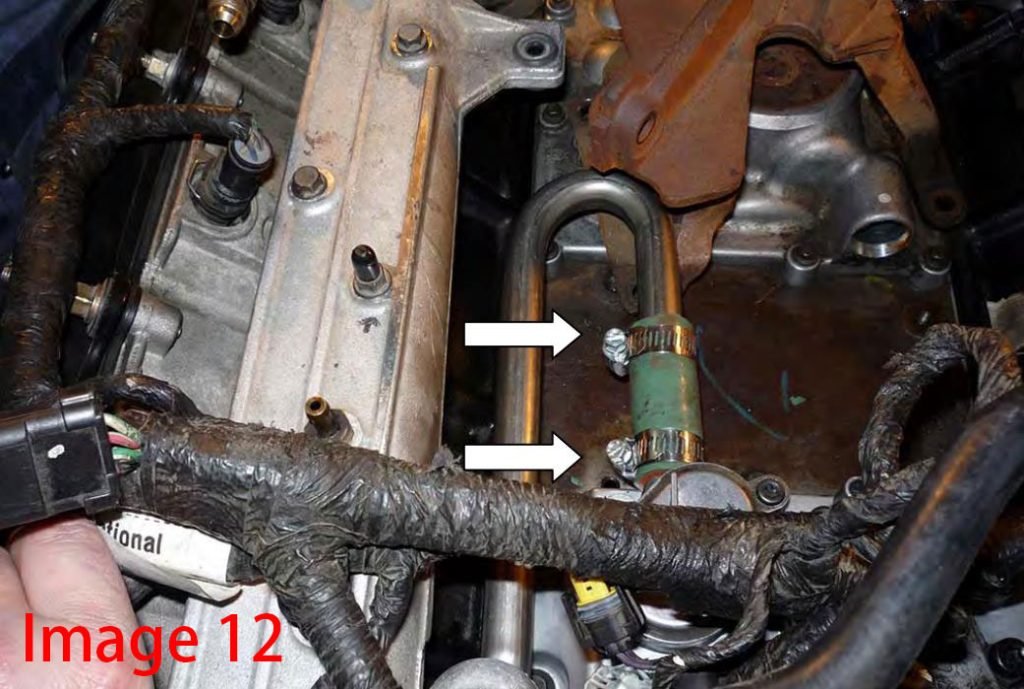
Step 19:Install the turbo charger pedestal mount and torque to 23 ft lbs.(Image 13)
Step 20:Install turbo oil drain with new O-rings.
Step 21:Reconnect the engine wiring harness and injector wiring harness.
Step 22:Install turbo charger. (NOTE: The three (3) mounting bolts should be left loose initially). Next connect the feed pipe and exhaust down pipe and tighten clamps. Torque bolts to 18 ft lbs and connect oil feed pipe.
Step 23:Re-install EGR Valve, Alternator, Fan Shroud, FICM and Intercooler air to air tubes.
Step 24:Re-install Air Intake tubes and box. (NOTE: Replace O-ring on vent pipe into Valve Cover)
Step 25:Mount coolant bottle and reconnect the small hoses. Fill system with coolant.
Step 26:Re-connect batteries.
Step 27:Start engine and check for leaks.
Step 28:Road test vehicle and then check for leaks again. Top up coolant and engine oil as required.
3 Simple Tips for Install egr delete kit 6.0 powerstroke

3 simple tips when you install the EGR removal kit, which will help you know how to protect yourself.
Caution!!! Never work on a hot exhaust system. Serious injury in the form of burns can result If the vehicle has been in use and the exhaust system is hot, allow vehicle to cool for at least 1 hour. Always wear eye protection when working under any vehicle.
Note: Before removing the original parts from your vehicle, please compare the parts you have received with the bill of materials provided on this page to assure that you have all the parts necessary for the installation of your new Sinister EGR kit.
Note: With a used vehicle, we suggest a penetrating spray lubricant to be applied liberally to all exhaust fasteners and allowing a significant period of time for the chemical to lubricate the threads before attempting to disassemble.[Source:Dalessuperstore]
Bookmark this post for future reference
Conclusion about Install egr delete kit 6.0 powerstroke
Most people have no trouble following the instructions to install the EGR Delete Kit.
By removing the Exhaust Gas Recirculation (EGR) system, an EGR delete kit can help you restore your diesel engine’s power levels, which can also improve your overall fuel efficiency. With this aftermarket kit, you can potentially see an increase of up to 20% in your fuel economy. Additionally, the EGR delete kit can also help improve your engine’s longevity.
Keep this post handy for quick reference. For more questions about installing the 6.4L Powerstroke EGR Delete Kit, please post a comment below.
You can also read more guides on installing EGR Delete Kit in different engines
FAQ about Install egr delete kit 6.0 powerstroke
1.
Question:How long did it take you to install the egr delete kit?
Answer:They can be done in 3-5 hours if you have done a few. if you havent then it will take the better part of a day.
2.Video for Install egr delete kit 6.0 powerstroke
